Implementing MomentPerks SDK (Embedded Mode)
Who is this for: Web developers who want to display MomentPerks offers inline within a page layout rather than in a modal overlay.
Outcome: Integrate the MomentPerks JavaScript SDK in embedded mode using a target container element, rendering offers as a seamless part of the existing page.
Overview
The MomentPerks JavaScript SDK enables you to display personalized offers directly within your webpage or mobile webview. This guide explains how to integrate the SDK in embedded mode, configure its behavior, customize its appearance, and verify the integration.
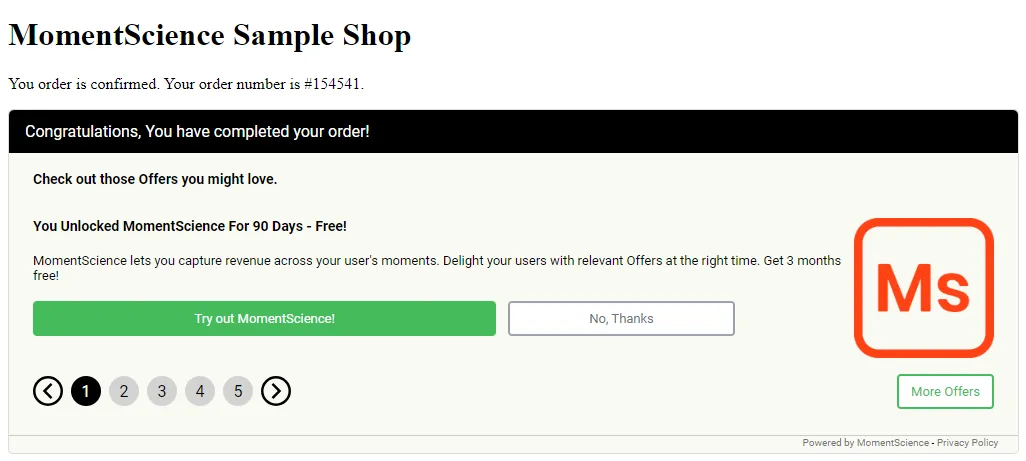
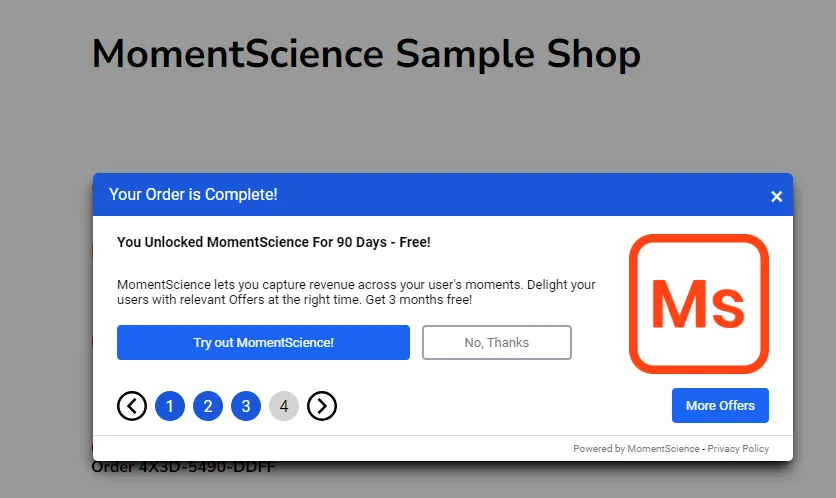
When to Use Embedded Mode
By default, the MomentPerks SDK displays offers in a modal overlay. Use embedded mode when you want to:
- Render offers inline as part of your page or app layout.
- Maintain a native experience without interrupting user flow.
- Control where the offer unit appears using a target container.
Implementation Steps
Follow these steps to implement the MomentPerks SDK as an embedded offer unit on your web page or within a mobile app webview.
Step 1: Identify/Create the Container Element
- Determine where you want the offer unit to be displayed on your page.
- Create a <div> element that will serve as the container for the offer unit.
Example HTML:
<div id="adpx"></div> <!-- Using 'adpx' as an example -->Step 2: Add the MomentPerks SDK script
- Obtain the SDK Code:
- Log in to the MomentScience dashboard and navigate to the Moments Integration to obtain the MomentPerks SDK code snippet.
- Insert the SDK Code into Your Web Page:
- Paste the obtained SDK code into the <head>section of your web page to ensure it loads correctly.
Step 3: Enable Embedded Mode
To render offers inline in your page layout, update your SDK configuration to use embedded mode.
Configure Embedded Settings
Add the following to your window.AdpxConfig object:
window.AdpxConfig = {
   accountId: 'YOUR_SDK_ID',
   autoShow: true,
   settings: {
      embedded: {
         enabled: true,
         targetElement: 'adpx',
         showHeader: true,
         showFooter: true,
         showBorder: true,
         fill_container: true
      }
   }
};
Embedded Mode Parameters
Parameter | Type | Default | Description |
|---|---|---|---|
enabled | Boolean | False | Enables embedded mode so offers render inline instead of in a modal. |
targetElement | String | adpx | Container element ID where offers render. Must match the container you created in Step 1. |
showHeader | Boolean | True | Shows the offer unit header. |
showFooter | Boolean | True | Shows the offer unit footer. |
showBorder | Boolean | True | Adds a border around the embedded offer unit. |
fill_container | Boolean | False | Expands the offer unit to fill the container height. |
Key checks
- Ensure targetElement exactly matches the id of the <div> created in Step 1.
- If targetElement is missing, the SDK uses adpx by default.
- Confirm enabled: true is set under settings.embedded; otherwise, the SDK keeps modal behavior.
For more information, please refer to the Presentation Options documentation.
Step 4. Customize the interface and behavior
You can customize the appearance and behavior of the offer unit either:
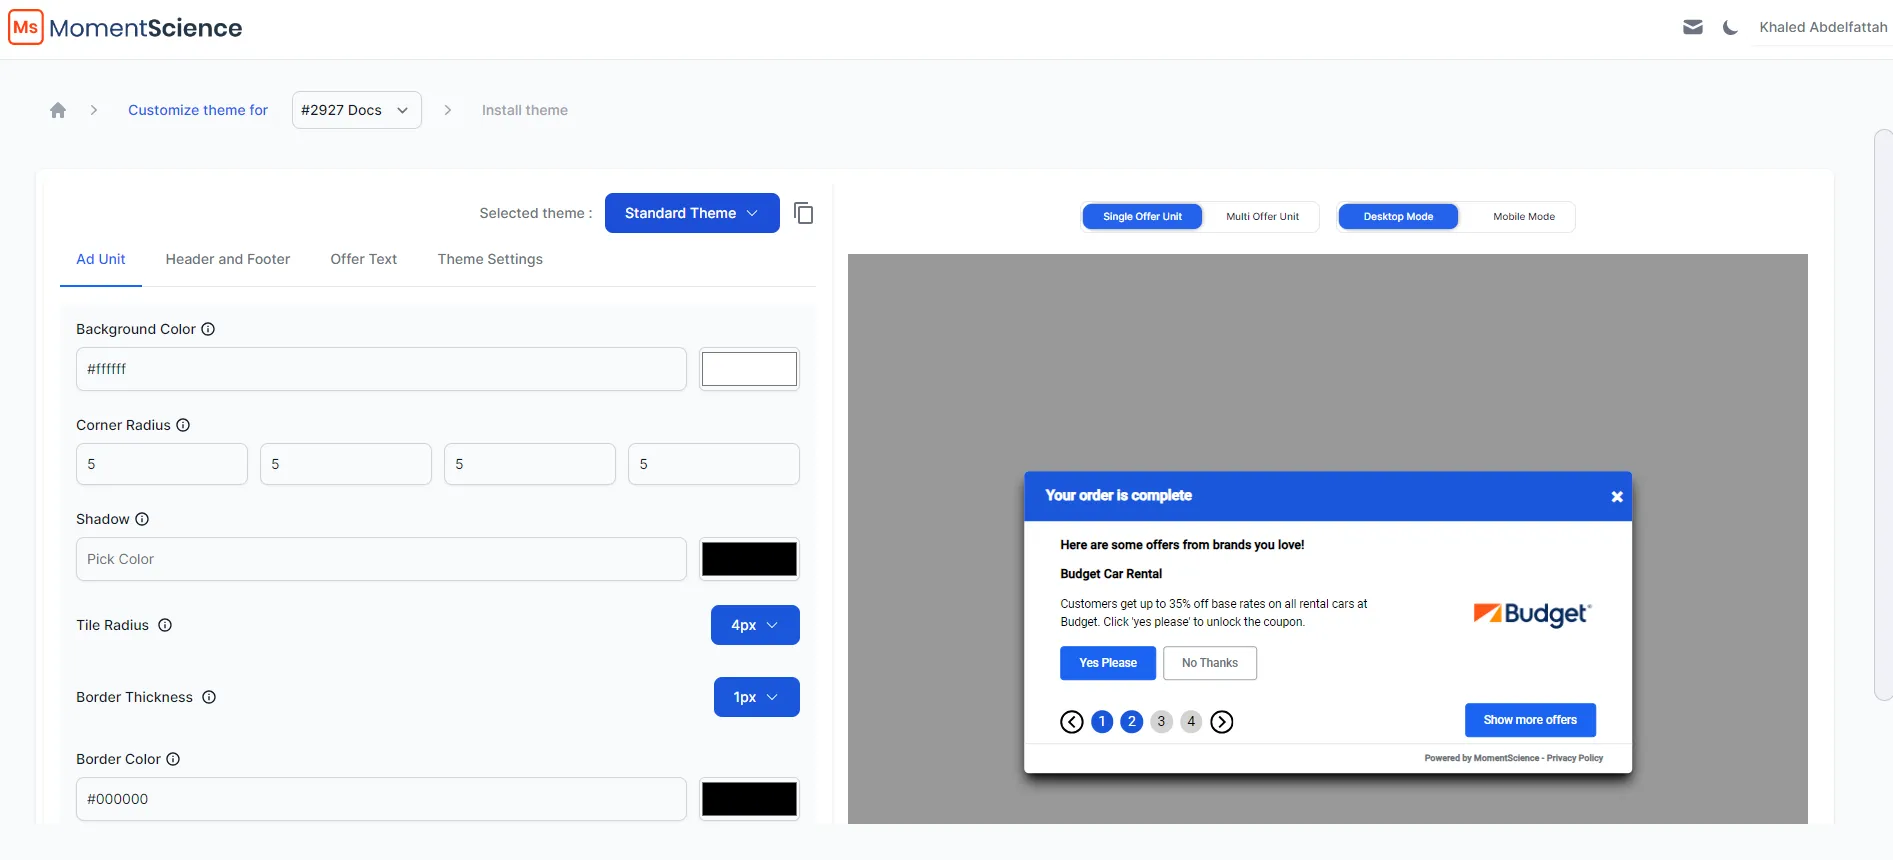
- Via the dashboard: No-code customization.
- Via code overrides: Use the settings and stylesfields in the SDK configuration.
Option A: Dashboard Customization
- Log in to the MomentScience dashboard and navigate to the Integrations section.
- Use the dashboard settings to customize the look and feel of the offer unit to match your site’s design guidelines.
Step 5: Change the Number of Ads and Other Properties
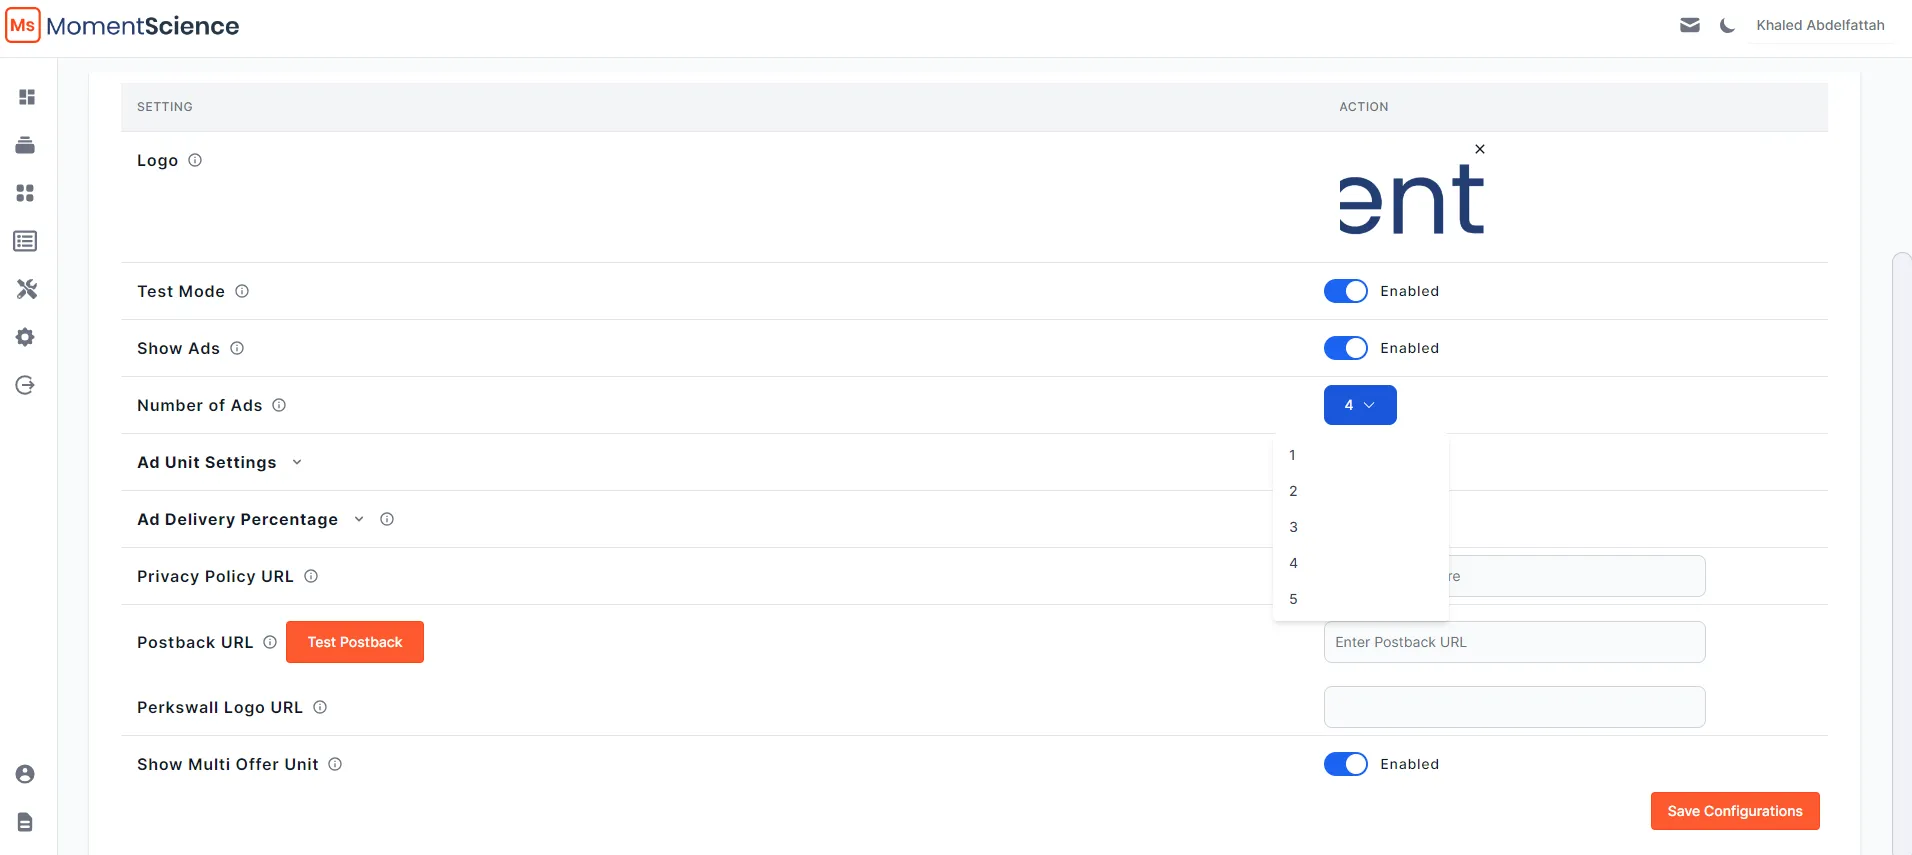
- In the MomentScience dashboard, go to the Configuration Section.
- Adjust the "Number of Ads" to control the number of Offers to present at a time as needed without changing the code.
Step 6: Pass Payload Values for Targeting, Reporting, and Personalization (Optional)
Enhancing or optimizing your implementation of MomentScience can be achieved by passing payload information when the MomentScience unit is loaded. This additional data allows the platform to:
- Target Offers More Effectively:
- Using payload values helps MomentScience deliver more relevant offers to users, increasing the chances of conversion and overall yield.
- Improve Reporting:
- Payload values can be utilized to segment and analyze performance across different dimensions, providing deeper insights into how various user groups interact with your offers.
- Personalize the Moments Experience:
- By passing specific information about users, you can tailor the content and presentation of Offers to better meet individual preferences and behaviors.
Further Recommendations
To maximize the effectiveness and efficiency of your MomentScience Moments JS SDK implementation, consider the following best practices and advanced techniques:
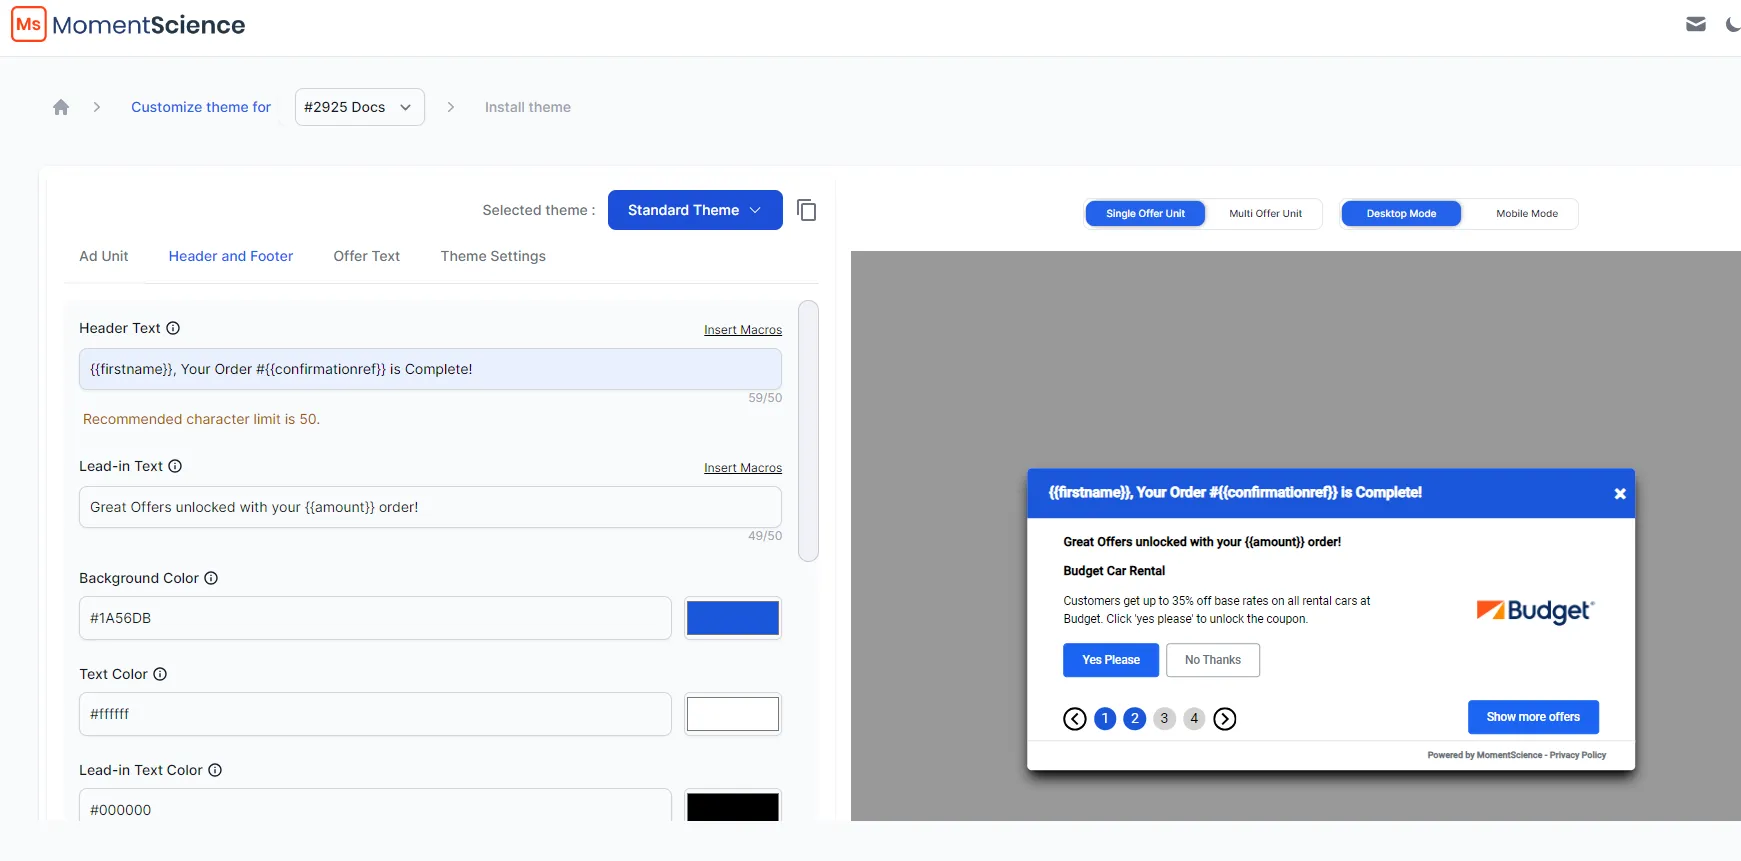
Use Macros to Personalize Your Moments
Macros can be used to dynamically insert user-specific data into your Offers, enhancing personalization and relevance. Common macros include user names, order references, and purchase amounts.
Utilize Callback Functions
The Moments JS SDK supports callback functions that can be triggered at various points in the Offer lifecycle. This allows for greater control over user interactions and can be used to integrate with your internal tracking systems.
Implement Postbacks
Postbacks provide real-time data on conversions related to your Offers. They are essential for tracking the effectiveness of your campaigns and optimizing them for better performance.
If you're running into any issues while going through the integration process, feel free to contact us at help@momentscience.com